
You have a business idea. A portfolio to showcase. A blog to launch. But every time you open WordPress, you stare at a blank screen — paralyzed by the gap between the beautiful website you imagine and the technical knowledge you think you need to build it.
Here is the truth nobody tells beginners — you do not need to know a single line of code to design professional WordPress pages that look like they cost thousands of dollars to build. In 2026, WordPress combined with modern page builders has made professional web design genuinely accessible to anyone willing to follow a clear, step-by-step process.
This guide gives you exactly that — 7 proven steps to design professional WordPress pages that load fast, look stunning on every device, and rank well on Google from day one. Whether you are building a business website, an online store, or a personal brand, every step in this guide applies directly to your project.
Why WordPress Is Still the Best Choice in 2026
Before the steps, understand why WordPress remains the world’s most powerful platform for professional web design — powering over 43% of all websites on the internet.
WordPress gives you complete ownership of your website, unlimited customization through thousands of plugins and themes, and a massive global community providing support, tutorials, and resources. Unlike closed website builders that lock your content inside their platforms, WordPress gives you complete data portability and freedom.
When you design professional WordPress pages on this platform, you build a long-term digital asset — not a rented space on someone else’s system.
Step 1 — Choose Reliable Hosting and Install WordPress
Every professional WordPress website starts with fast, secure hosting. Your hosting provider determines your website’s speed, uptime, and security — three factors that directly affect both user experience and Google rankings.
What to look for in WordPress hosting:
- SSD storage for fast data retrieval
- Built-in SSL certificate for HTTPS security
- Global CDN (Content Delivery Network) for fast loading worldwide
- Automatic WordPress installation or one-click setup
- Regular automated backups
- Responsive 24/7 customer support
Many premium hosting providers offer one-click WordPress installation that gets your site live in under five minutes. Once installed, log into your WordPress dashboard at yourwebsite.com/wp-admin and you are ready to start building.
Step 2 — Select a Professional Theme That Matches Your Brand
Your WordPress theme is the visual foundation of every page on your website. Choosing the right theme before you start building saves hours of redesign work later.
Criteria for selecting a professional theme:
- Lightweight and fast-loading — avoid bloated themes with unnecessary features
- Fully responsive — looks perfect on desktop, tablet, and mobile automatically
- Compatible with your chosen page builder
- Regularly updated by the developer for security and compatibility
- Clean, minimal design that does not overwhelm your actual content
Go to Appearance → Themes → Add New in your WordPress dashboard to browse thousands of free and premium themes. For most professional websites, a simple, clean theme works better than an elaborate one — your content and page design should be the focus, not the theme itself.
When you design professional WordPress pages, your theme provides the frame — your page builder creates the picture inside it.
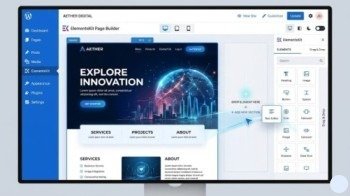
Step 3 — Install a Page Builder for Visual Design Control
A page builder is the tool that transforms WordPress from a basic content editor into a full visual design environment. The best page builders use drag-and-drop interfaces that let you see exactly how your page looks as you build it — no coding required.
Top page builders for professional WordPress pages in 2026:
- Elementor — Most popular, DA 74, beginner-friendly with advanced professional features
- Beaver Builder — Clean interface, excellent performance, developer-friendly
- Divi Builder — Comprehensive design options, built-in A/B testing
- Gutenberg (WordPress Block Editor) — Built-in, fast, improving rapidly with each WordPress update
Install your chosen page builder by going to Plugins → Add New and searching by name. After activation, every page and post on your site will have an “Edit with [Builder Name]” button that opens the visual editor.
Elementor is recommended for beginners because its interface combines simplicity with power — you can design professional WordPress pages in hours rather than days without any previous design experience.

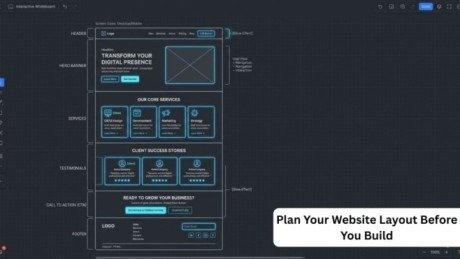
Step 4 — Plan Your Page Structure Before You Build
The most common mistake beginners make is opening the page builder and starting to add elements without any planning. This leads to disorganized layouts that look amateur regardless of how beautiful the individual elements are.
Before touching the page builder, define:
- Page goal — What is the single action you want visitors to take on this page?
- Content sections — Hero area, features, testimonials, CTA, contact — map these out on paper first
- Visual hierarchy — What should the visitor see first, second, and third?
- Color palette — Choose 2 to 3 primary brand colors and stick to them throughout
- Typography — Select 2 fonts maximum — one for headings, one for body text
Professional web designers spend more time planning pages than building them. When you design professional WordPress pages with a clear structure mapped out in advance, the actual building process becomes fast and focused.
Step 5 — Build Your Header and Footer First
Your header and footer appear on every single page of your website — which makes them the most important design elements for creating a consistent, professional brand impression.
Essential header elements:
- Your logo in the top left position — standard visual convention users expect
- Clear navigation menu with maximum 6 to 7 items
- A prominent Call-to-Action button — “Get Started,” “Book a Call,” “Shop Now”
- Optional: Search bar for content-heavy websites
Essential footer elements:
- Copyright notice with dynamic year that updates automatically
- Secondary navigation links — Privacy Policy, Terms of Service, Sitemap
- Social media profile icons with direct links
- Contact information — email address or phone number
- Brief company description or tagline
In Elementor, build your header and footer through Templates → Theme Builder. Once created, they automatically appear across every page — saving you from rebuilding them individually for each new page you create.
Step 6 — Design Each Page with Conversion in Mind
Now comes the actual page building — and this is where most tutorials stop giving useful advice. Beautiful design that does not convert visitors into customers or subscribers is decoration, not professional web design.
Every page section should serve a specific purpose:
Hero Section (Top of page):
- Bold headline that communicates your core value proposition in one sentence
- Supporting subheadline that expands on the headline with key benefit
- Primary CTA button in a contrasting color that stands out immediately
- Hero image or video that visually reinforces your message
Social Proof Section:
- Client logos, testimonials, review ratings, or case study results
- Real photos of real customers — stock photos reduce credibility significantly
- Specific numbers and results — “helped 500+ businesses” beats “helped many businesses”
Features or Services Section:
- Clean icon or image paired with each feature
- Benefit-focused descriptions — explain what the feature does for the user, not just what it is
- Consistent spacing and alignment across all cards
Call-to-Action Section:
- Repeat your primary CTA near the bottom of every page
- Create urgency naturally — limited spots, free consultation, first month discount
When you design professional WordPress pages with conversion intentionally built into every section, your website works as a 24/7 sales and lead generation tool — not just a digital brochure.
Step 7 — Optimize for Speed, Mobile, and SEO
A beautifully designed page that loads slowly, breaks on mobile, or never appears in Google Search has zero real-world value. Optimization is not an afterthought — it is an integral part of professional WordPress page design.
Speed optimization checklist:
- Compress all images before uploading — use WebP format for best results
- Install a caching plugin like WP Rocket or W3 Total Cache
- Use a CDN to serve your content from servers closest to each visitor
- Minimize CSS and JavaScript files through your caching plugin settings
- Keep your installed plugins below 20 — each plugin adds load time
Mobile optimization checklist:
- Preview every page in your page builder’s mobile view before publishing
- Ensure font sizes are minimum 16px on mobile screens
- Check that all buttons are large enough to tap easily — minimum 48×48 pixels
- Verify no content overflows the screen horizontally
- Test your actual mobile experience using Google’s Mobile-Friendly Test tool
SEO optimization checklist:
- Install Yoast SEO or Rank Math plugin for on-page optimization guidance
- Write a unique, keyword-rich title tag for every page (under 60 characters)
- Write a compelling meta description for every page (under 155 characters)
- Add descriptive alt text to every image on the page
- Use a logical heading structure — one H1, multiple H2s, H3s for subsections
- Add 3 to 5 internal links on every page pointing to related content
Every time you design professional WordPress pages, run through this three-part optimization checklist before clicking publish. Pages that are fast, mobile-friendly, and SEO-optimized consistently outperform beautifully designed but unoptimized pages in both traffic and conversions.

Final Thoughts
Learning to design professional WordPress pages is one of the most valuable digital skills you can build in 2026. Every step in this guide — from hosting selection to speed optimization — works together as a complete system. Skip any step and the final result suffers. Follow all seven and you produce pages that genuinely compete with professionally built agency websites.
Start with Step 1 today. Do not wait until you feel ready or until you know everything — the learning happens fastest when you are actively building. Your first page will not be perfect, and that is completely fine. Each page you design professional WordPress pages for gets faster, cleaner, and more effective than the last. That compounding improvement is how ordinary beginners become confident, capable web designers.
Frequently Asked Questions (FAQs)
Q1: Do I need coding skills to design professional WordPress pages?
No. Modern page builders like Elementor and Beaver Builder use drag-and-drop visual editors that require zero coding knowledge. You can design fully professional pages using pre-built templates and widgets without writing a single line of code.
Q2: How long does it take to build a professional WordPress page?
A simple landing page takes 2 to 4 hours for a beginner using templates. A full homepage with multiple sections takes 4 to 8 hours. With experience and a clear plan, the same pages take 1 to 2 hours. Planning before building dramatically reduces total time.
Q3: What is the best page builder for WordPress in 2026?
Elementor remains the most popular choice with over 10 million active installations. It balances beginner-friendliness with professional-level design capabilities. Beaver Builder is excellent for performance-focused sites and Divi is strong for designers who want maximum creative control.
Q4: How much does it cost to build a professional WordPress website?
A self-built WordPress website costs between $50 to $200 per year for hosting and a premium theme. Adding a premium page builder like Elementor Pro adds approximately $60 to $100 per year. Total annual cost is typically $100 to $300 — a fraction of what agencies charge for similar results.
Meta Description
Design professional WordPress pages in 7 easy steps for 2026. Create fast, stunning, SEO-friendly pages without coding skills.
- Why WordPress Is Still the Best Choice in 2026
- Step 1 — Choose Reliable Hosting and Install WordPress
- Step 2 — Select a Professional Theme That Matches Your Brand
- Step 3 — Install a Page Builder for Visual Design Control
- Step 4 — Plan Your Page Structure Before You Build
- Step 5 — Build Your Header and Footer First
- Step 6 — Design Each Page with Conversion in Mind
- Step 7 — Optimize for Speed, Mobile, and SEO
- Final Thoughts
- Frequently Asked Questions (FAQs)
- Meta Description