
Your sidebar has a basic “Recent Posts” list. Your footer has a generic text block. Your homepage has a static image widget that has not changed in two years.
And your visitors? They are leaving.
In 2026, generic static widgets do not just look outdated — they actively destroy the professional credibility your website needs to convert visitors into customers. Research shows that personalized, well-designed widgets increase conversion rates by up to 202% compared to default static layouts. That is not a small improvement. That is a complete transformation of what your website can achieve.
The good news — you do not need to be a PHP developer to customize WordPress widgets that look and perform at a professional level. You need the right process, the right tools, and a clear step-by-step framework that eliminates guesswork entirely.
This guide gives you exactly that. Six powerful, actionable steps to Personalize WordPress widgets like a professional developer — without writing a single line of unnecessary code — and build dynamic, fast, conversion-focused components that make every page of your website work harder for your business.
Why Customizing WordPress Widgets Matters More Than Ever in 2026
WordPress powers 43.5% of all websites on the internet in 2026. That dominance means two things simultaneously — the platform is incredibly powerful, and your competition is using it too.
The difference between websites that grow and websites that stagnate often comes down to the quality and relevance of their on-page components. When you customize WordPress widgets properly, you transform passive page elements into active tools that guide visitor behavior, build trust, and drive specific actions.
Standard widgets that shipped with your theme were designed to work for everyone — which means they are optimized for no one specifically. Custom, well-configured widgets speak directly to your audience, reflect your brand identity, and respond to what your visitors actually need at each specific moment on your site.
Over 100 billion Gutenberg blocks have been created inside WordPress — a clear signal that the entire ecosystem has moved toward modular, customizable components. If you are still using default widget areas without customization, you are building on a foundation the industry has already moved past.
Step 1 — Audit Your Current Widget Setup Before Changing Anything
The most common mistake when attempting to customize WordPress widgets is jumping directly into changes without understanding what is currently live, what is working, and what is causing damage.
How to run a widget audit:
- Go to Appearance → Widgets in your WordPress dashboard
- List every active widget across every widget area — sidebar, footer, header, popup zones
- For each widget, ask three questions: Is this widget still relevant? Is it converting? Does it match my current brand?
- Check Google Analytics to see which pages with active widget areas have high bounce rates
- Use a heatmap tool like Hotjar to see whether visitors actually interact with your current widgets
Widgets that get zero clicks, carry outdated information, or break your visual consistency should be removed before you add anything new. A clean, focused widget setup always outperforms a cluttered one — regardless of how well each widget is designed.
Document your audit findings before moving to Step 2. This prevents you from rebuilding the same problems in a new design.
Step 2 — Choose the Right Tools to Customize WordPress Widgets

The tools you select determine how quickly you can customize WordPress widgets and how much technical knowledge is required to achieve professional results.
Three main approaches in 2026:
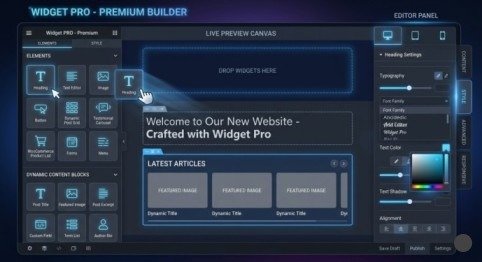
Visual Page Builder (Recommended for most users) Elementor is the leading choice — active on over 15 million websites globally. Its drag-and-drop interface lets you build, style, and configure widgets visually with zero PHP knowledge. Elementor Pro’s Loop Builder allows you to create fully dynamic, data-driven widgets by connecting visual templates to WordPress query parameters.
Native Gutenberg Block Editor WordPress’s built-in editor has improved significantly. The block-based system allows you to create custom widget areas using patterns and reusable blocks. It requires no additional plugins and performs excellently for speed — but offers less visual design control than dedicated page builders.
Custom PHP via WP_Widget API For developers who need complete structural control, extending the native WP_Widget class provides maximum flexibility and performance. Running on PHP 8.3 — the recommended version in 2026 — delivers 15 to 20% faster script execution compared to older PHP versions. However, this approach requires significant technical expertise and ongoing maintenance.
For most website owners and small business operators, Elementor provides the ideal balance of power, flexibility, and ease of use when you need to Personalize WordPress widgets without hiring a developer.
Step 3 — Plan Widget Content and Goals Before Designing
Every widget on your website should exist for a specific, measurable reason. Designing before planning is why most widget customization projects produce beautiful components that generate zero results.
Questions to answer before designing any widget:
- What is the single goal of this widget? (Email signup, product discovery, content navigation, social proof)
- Who is the visitor most likely to see this widget? (New visitor, returning customer, buyer in research phase)
- What action should this widget prompt them to take?
- What data will this widget display — static content, dynamic WordPress data, or external API data?
- Where on the page will this widget appear — and does that placement make strategic sense?
High-converting widget types by goal:
| Goal | Widget Type | Key Elements |
| Email capture | Opt-in form widget | Headline, benefit statement, minimal form fields |
| Product discovery | Dynamic product grid | Filters, price, CTA button |
| Trust building | Testimonial widget | Photo, name, specific result |
| Content navigation | Recent posts widget | Featured image, title, category |
| Local relevance | Location/map widget | Address, hours, directions link |
| Social proof | Review/rating widget | Star rating, review count, source |
Match your widget type to a specific goal and design every visual element to support that single objective. Widgets trying to achieve multiple goals simultaneously achieve none of them effectively.
Step 4 — Build and Style Your Custom Widget
With your plan in place, open your chosen tool and begin building. When you customize WordPress widgets using Elementor, the process follows a clear visual workflow that produces professional results without technical barriers.
Building a custom widget in Elementor — step by step:
- Go to Elementor → My Templates → Add New
- Select Widget as the template type and name it clearly
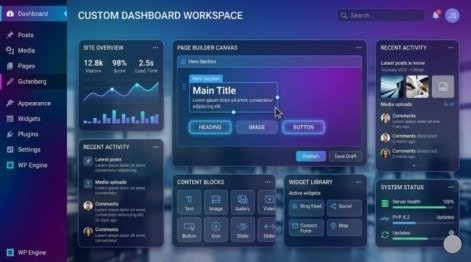
- In the editor, drag your chosen widgets onto the canvas — heading, image, button, form, etc.
- Click each element and use the left panel to customize content, style, and advanced settings
- Apply your brand colors using Elementor’s Global Colors system — this ensures consistency across every widget automatically
- Set typography using Global Fonts — one heading font, one body font, consistent across the site
- Configure spacing and padding for visual breathing room — overcrowded widgets perform poorly
- Add hover effects and animations sparingly — motion should guide attention, not distract it
Critical styling principles for professional widget design:
- Contrast — Your CTA button must be visually distinct from surrounding elements. If everything competes for attention, nothing gets it
- Whitespace — Empty space is not wasted space — it directs the eye toward what matters
- Hierarchy — The most important information should be the largest and highest on the widget
- Consistency — Colors, fonts, and spacing should match your site’s established design system exactly
- Mobile first — Preview your widget in Elementor’s mobile view and adjust before finalizing — over 60% of web traffic in 2026 is mobile
After styling, use the Responsive Controls in Elementor to set different column counts, font sizes, and spacing for tablet and mobile breakpoints. A widget that looks perfect on desktop but breaks on mobile is not a professional widget — it is an incomplete one.
Step 5 — Add Dynamic Data to Make Widgets Truly Powerful
Static widgets display the same content to every visitor regardless of context. Dynamic widgets display relevant, personalized content that changes based on the visitor’s behavior, location, or the specific page they are viewing — and this distinction is where professional widget customization separates from beginner-level work.
How to add dynamic data when you customize WordPress widgets:
Dynamic Tags in Elementor: Click the dynamic tags icon (stack symbol) next to any content field in Elementor. This connects the field directly to live WordPress data — post title, featured image, author name, custom field value, category name, publication date — displayed automatically for whatever content the visitor is currently viewing.
Loop Builder for Dynamic Content Grids: In Elementor Pro, navigate to Theme Builder → Loop Item. Design a single card template using dynamic tags. Then drop the Loop Grid widget onto your page and select your template. Set query parameters — post type, category, number of posts, ordering — and Elementor automatically repeats your card design for every matching piece of content.
ACF (Advanced Custom Fields) Integration: If your site uses custom fields for pricing, specifications, locations, or any other structured data, connect those fields to your widget using Elementor’s ACF dynamic tag. Your widget pulls the exact custom data for each post or page automatically — no manual updates required.
External API Data: For widgets displaying live data — weather, stock prices, event feeds, social media counts — use a lightweight REST API connection with WordPress Transients caching. Cache the API response for 30 to 60 minutes so your widget reads from the database rather than hitting the external server on every page load. This protects both performance and API rate limits simultaneously.
Dynamic widgets are the professional standard in 2026. When you truly customize WordPress widgets with live data connections, your website feels relevant and intelligent rather than static and outdated.
Step 6 — Optimize Widget Performance and Deploy Safely
A beautifully designed, dynamically powered widget that slows your page load time by two seconds is a net negative for your website. Performance optimization is the final — and most frequently skipped — step when professionals customize WordPress widgets.
Performance optimization checklist:
- Conditional asset loading — Ensure your widget’s CSS and JavaScript files load only on pages where the widget actually appears. Never enqueue globally. In Elementor, this is handled automatically for built-in widgets
- Image optimization — Any images inside your widget should use WebP format, have explicit width and height attributes set, and use lazy loading for below-fold placement
- Transient caching — Any widget pulling external data must cache responses using the WordPress Transients API. Set expiration based on how frequently the data changes — hourly for live feeds, daily for less volatile data
- Database query efficiency — If your widget runs custom WP_Query loops, ensure you are querying only the fields you need using fields => ‘ids’ where possible rather than pulling full post objects
- PHP version — Confirm your hosting runs PHP 8.2 or 8.3. Older PHP versions process widget logic significantly slower — the performance gap is measurable and real
Deployment best practices:

Never push a newly customized widget directly to your live website without testing. Use a staging environment — most premium hosting providers include one — to validate that your widget displays correctly across devices, loads within acceptable speed thresholds, and does not conflict with other plugins or theme elements.
After testing successfully, deploy to production and immediately verify in Google Search Console that your Core Web Vitals scores have not regressed. A new widget that pushes your LCP above 2.5 seconds needs further optimization before it stays live.
Final Thoughts:
Every professional website you admire that feels fast, relevant, and conversion-focused has one thing in common — its widgets are not defaults. Someone made deliberate decisions about what to show, why to show it, and how to make it perform. That is exactly what happens when you customize WordPress widgets using the six-step framework in this guide.
Start with the audit in Step 1 and work through each step without skipping. The planning stages feel slower than jumping straight to design — but they are what separate widgets that convert from widgets that simply exist. When you customize WordPress widgets with a clear goal, the right tools, dynamic data, and performance built in from the start, every page of your website becomes a more powerful asset for your business every single day.
Frequently Asked Questions (FAQs)
Q1: Do I need coding knowledge to customize WordPress widgets?
No coding is required. Elementor allows drag-and-drop customization easily. The visual editor handles all technical work automatically.
Q2: What is the difference between a widget and a block in WordPress?
Widgets are used in sidebars and footers. Blocks are used inside posts and pages in Gutenberg.
Q3: Will adding custom widgets slow down my WordPress website?
Only slow if poorly built. Well-optimized widgets have little to no impact on speed.
Q4: How do I make my WordPress widgets show different content on different pages?
Use Elementor display conditions. They let you control where each widget appears.
Q5: Can I customize widgets on a WordPress website without Elementor?
Yes, you can customize without Elementor. Use Gutenberg, PHP, or other page builders instead.
Meta Description:
Learn how to customize WordPress widgets like a pro in 2026. Follow these 6 powerful steps to build dynamic, fast, and conversion-driven widgets without coding.
- Why Customizing WordPress Widgets Matters More Than Ever in 2026
- High-converting widget types by goal:
- Final Thoughts:
- Frequently Asked Questions (FAQs)
- Q1: Do I need coding knowledge to customize WordPress widgets?
- Q2: What is the difference between a widget and a block in WordPress?
- Q3: Will adding custom widgets slow down my WordPress website?
- Q4: How do I make my WordPress widgets show different content on different pages?
- Q5: Can I customize widgets on a WordPress website without Elementor?
- Meta Description: