
Screenshots are very useful for anyone using a Windows laptop. They help you save important information, share errors with tech support, or capture something interesting on your screen. Knowing how to take a screenshot correctly can save time and make your work easier. Windows 10 and 11 offer several ways to capture your screen. You can use keyboard shortcuts, built-in tools, or apps that let you edit and annotate your screenshots.
Using the right method to take a screenshot prevents blurry images or missing files. It also helps when you need to capture screens during meetings, online classes, or gaming. In this guide, we will show you 5 easy ways to take screenshots on your Windows 10 or Windows 11 laptop. Additionally, we will discuss common problems and solutions so that every screenshot comes out clear and perfect.
Why Screenshots Are Important
Before we dive into the methods, it’s important to understand why screenshots matter. Screenshots allow you to:
- Save a copy of online receipts or important documents.
- Share error messages with tech support.
- Capture images from videos or presentations.
- Create tutorials, guides, or learning material.
Without knowing how to take a screenshot properly, you might face problems like blurry images, incorrect file formats, or accidentally missing important parts of the screen. Therefore, learning multiple methods ensures you always have a solution at hand.
1. Using the Print Screen (PrtSc) Key
Using the Print Screen (PrtSc) key is one of the easiest and fastest ways to capture a screenshot on Windows laptops. This method allows users to quickly save or copy their screen for tutorials, troubleshooting, presentations, and work documentation. It is compatible with almost all Windows versions, including Windows 10 and Windows 11, making it a reliable screenshot solution. Learning how to use the PrtSc key can improve productivity and help you share visual information more effectively.
Full Screen Capture
- Press the PrtSc key on your keyboard.
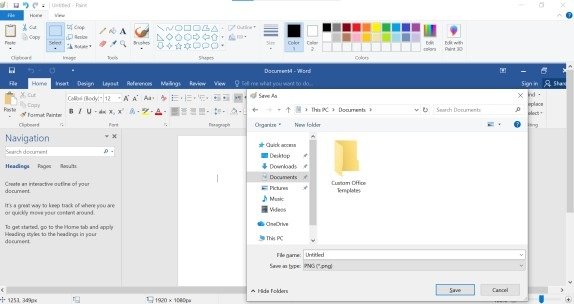
- Open an image editor like Paint or Word.
- Press Ctrl + V to paste the screenshot.
- Save it in PNG or JPEG format.
Active Window Capture
Sometimes, you only need to capture the current window:
- Click the window you want to capture.
- Press Alt + PrtSc.
- Open Paint or another editor, press Ctrl + V, and save.
- This method captures only the active window, not the entire screen.
It is perfect for taking clean and focused screenshots for work, tutorials, or presentations.
Common Screenshot Issues and How to Fix Them
- PrtSc not working: Some laptops require pressing Fn + PrtSc. If it still doesn’t work, update your keyboard driver.
- Blurry screenshots: Save as PNG and check display resolution.
- Screenshots too big: Crop using Paint or Snip & Sketch.
Using the Print Screen key is a fast way to take a screenshot on Windows 10/11 laptop, but you must paste it into an editor first.
2. Windows + Print Screen Shortcut
If you want screenshots to save automatically, the Windows + PrtSc shortcut is perfect. This shortcut instantly captures the full screen and saves it without any extra steps. It automatically stores screenshots in the Pictures > Screenshots folder for easy access. This method is ideal for users who take frequent screenshots and want quick results. It works smoothly on most Windows laptops and PCs, including Windows 10 and Windows 11.
How to Use:
- Press Windows + PrtSc simultaneously.
- Your screen will briefly dim to indicate the screenshot is taken.
Open Pictures > Screenshots to find your file.
Advantages:
- Screenshots are automatically saved—no need to paste.
- Files are numbered for easy organization.
Problems & Solutions:
- Screenshots not saving: Check disk space and folder permissions.
- Multiple monitors: Captures all screens in one image; use the Snipping Tool for specific screens.
This is one of the fastest ways to take a screenshot on Windows 10/11 laptop if you need to save without opening additional programs.
3. Using the Snipping Tool
Windows has a built-in tool called Snipping Tool, which allows you to capture your screen in different shapes and add annotations. It lets you take free-form, rectangular, window, and full-screen snips with ease. You can also set a delay timer to capture pop-up menus and tooltips. This tool is ideal for tutorials, documentation, and professional screen capturing. It works smoothly on both Windows 10 and Windows 11.
Steps to Capture:
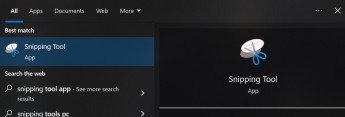
- Open Snipping Tool from the Start menu.
- Click New and choose:
- Rectangular Snip
- Free-form Snip
- Window Snip
- Edit or annotate your screenshot.
- Save it in your desired folder.
Sometimes the Snipping Tool does not work properly or may not appear on your system. In this case, you should update Windows or use Snip & Sketch as an alternative. If a menu or pop-up closes too quickly, it can be difficult to capture it. To fix this issue, use the “Delay” option so you can capture the full screen easily.
4. Snip & Sketch
Snip & Sketch is the modern replacement for Snipping Tool in Windows 10 and 11. It allows quick screenshots with editing and sharing options. It lets you capture full screen, specific windows, or selected areas with ease. You can also annotate, crop, highlight, and save images instantly for better productivity.
How to Use:
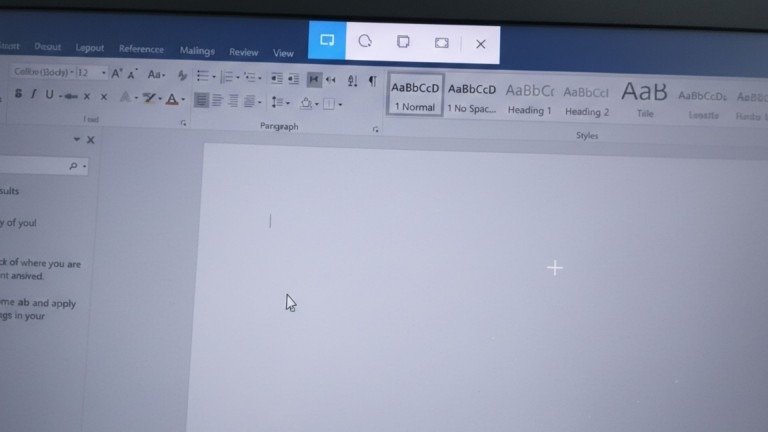
- Press Windows + Shift + S.
- Choose your snip type: Rectangular, Free-form, Window, or Full-screen.
- Click the notification to edit or save your screenshot.
Snip & Sketch makes screen capturing simple and quick. With an easy keyboard shortcut, you can select any part of the screen and edit it instantly. You can highlight text, draw lines, or add notes before saving or sharing the image. This makes it a great option for creating tutorials, sharing content online, or saving important information. However, if the notification does not appear after taking a screenshot, you should check your Windows notification settings. Also, if the image quality looks unclear, make sure your display is set to the correct resolution and save the file in PNG format for better clarity.
5. Device-Specific Tools
Some laptops come with their own screenshot features. For example, many HP laptops have a camera icon on the function keys. You can press that key to take a Screenshot quickly. In addition, you can use HP Support Assistant to capture and manage screen images. Dell laptops may also offer special key shortcuts based on the model.
Surface devices work a little differently. You need to press the Volume Up + Power buttons at the same time. As a result, the screen will dim, and your image will be saved automatically.
However, sometimes the keys may not work because of key conflicts. In this case, check your device manual for the correct combination. Also, if the screenshot does not save, make sure your storage is not full, and folder permissions are allowed. Therefore, using device tools is another easy way to take a Screenshot without using common shortcuts.
Tips for Perfect Screenshots
- Use PNG format to avoid blurry images.
- Check screen resolution before capturing.
- Annotate important areas for clarity.
- Organize screenshots in folders for easy access.
- Use third-party tools like Snagit or Lightshot for advanced needs.
Common Problems and Solutions
- · PrtSc key not working: Press Fn + PrtSc or update keyboard drivers to fix shortcut issues.
- · Blurry screenshots: Use PNG format and ensure your display resolution is set to high quality.
- · Screenshots not saving automatically: Check folder permissions, storage location, and available disk space.
- · Unable to capture menus: Use delay options in Snipping Tool or Snip & Sketch to capture drop-down menus.
- · Multiple monitors issues: Use Snipping Tool to select and capture only the required screen area.
Conclusion
Capturing your screen has never been easier. Whether you use Print Screen, Windows shortcuts, Snipping Tool, Snip & Sketch, or device-specific methods, these options allow anyone to take a screenshot on a Windows 10/11 laptop with ease. By understanding common problems and solutions, you can save time and create professional, clear screenshots every time.
Remember, the best method depends on your needs: quick capture, automatic saving, or editing before saving. Implement these tips today to make screenshots an effortless part of your workflow.
FAQs
1. How do I take a screenshot on a Windows 10/11 laptop?
You can press PrtSc, Windows + PrtSc, or Windows + Shift + S to take a screenshot on a Windows 10/11 laptop. The image can be saved automatically or pasted into Paint for editing.
2. Where are screenshots saved on a Windows laptop?
Screenshots taken with Windows + PrtSc are saved in Pictures > Screenshots folder. If you use PrtSc alone, you must paste and save the image manually.
3. Why is my PrtSc key not working?
Some laptops require pressing Fn + PrtSc instead of PrtSc alone. Updating keyboard drivers can also fix this issue.
4. How can I take a partial screenshot on Windows 11?
Press Windows + Shift + S to select a specific area of the screen. This method helps you take a screenshot on a Windows 10/11 laptop without capturing the full screen.
5. How do I take a screenshot without using the Print Screen button?
You can use the Snipping Tool or Snip & Sketch for screen capture. These tools allow editing and saving directly.
Meta Description
Learn 5 easy ways to take a screenshot on Windows 10/11 laptop using Print Screen, shortcuts, and Snipping Tool. Step-by-step guide with fixes for common screenshot problems.